- Top
- Network Settings
- Web Screen
- Using EasyIP Setup Tool Plus to set the unit’s settings
Using EasyIP Setup Tool Plus to set the unit’s settings
The settings related to the unit’s network can be set using the supplied EasyIP Setup Tool Plus.
When multiple of this unit are to be set, they each need to be set individually.
If setting cannot be done using the EasyIP Setup Tool Plus, make the individual settings for this unit and the personal computer in [NETWORK SETUP] in the camera menu.
|
|
 NOTE
NOTESetting Procedure
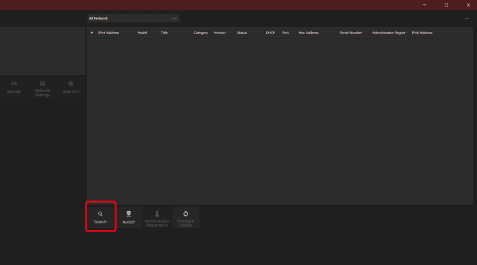
- Start the EasyIP Setup Tool Plus.
- Click the [Search] button.
- You can set the Network to be used for the search in the selection menu at the top of the screen.
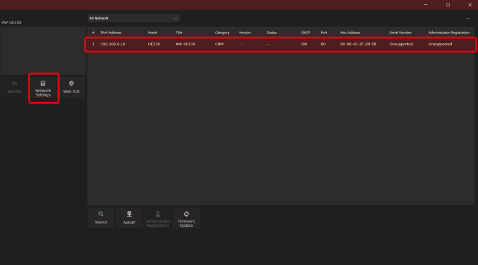
- Select the camera to configure and click the [Network Settings] button.
- The web screen for the selected camera is displayed when you click the [Web GUI] button.
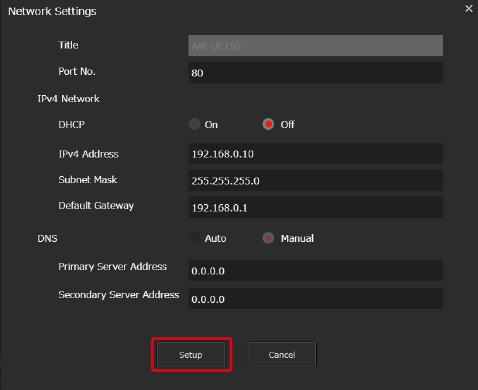
- Input the network items, and click the [Setup] button.
- Settings for DHCP, DNS, and Port No. are unsupported, so do not make settings for these.
- Enter the user name and password registered in the web screen, then click the [OK] button.
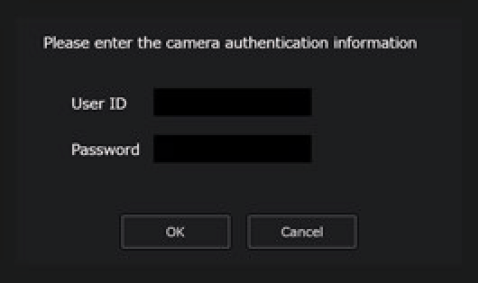
- Enter the user name and password that was set for the initial account or was set in the User management screen [User mng.] in the web screen.
 “Displaying the web screen using a personal computer”
“User management screen [User mng.]”
- After the [OK] button is clicked, it takes about 2 minutes for the settings in the unit to be completed. If this unit is turned off or the LAN cable is disconnected before the settings are completed, the settings will be invalidated. In this case, repeat the steps to set the settings.
|
|