- Top
- Network Settings
- Web Screen
- Displaying the web screen
Displaying the web screen
Connect the LAN connector on this unit and a personal computer and make a variety of settings in a web browser.
Use a LAN crossover cable to directly connect the LAN connector on this unit and a personal computer. When connecting via a switching hub, etc., use a LAN straight cable.
Notice regarding the Web screen
IP address and subnet mask
Select an IP address for the personal computer within the private address range while ensuring that it is different from the address of the unit. Set the subnet mask to the same address as the unit.
- Unit’s IP address and subnet mask (factory settings)
IP address |
192.168.0.30 |
Subnet mask |
255.255.255.0 |
|
|
Personal computer environment required to display the Web screen
For details on the personal computer environment required to display the Web screen, refer to following page.
 “Personal computer requirements”
Displaying the web screen using a personal computer
Screens from Windows (Microsoft Edge) are used as examples in this manual. There will be some differences in how the screen appears in other browsers, but the procedures will be the same.
- Start the web browser of the personal computer.
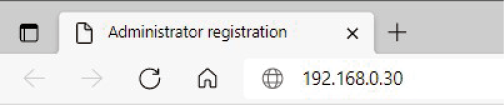
- Enter the IP address you configured on the EasyIP Setup Tool Plus in the address bar of the web browser.
- Example of input
http://registered URL
http://192.168.0.30
- If this unit is within a local network, make the settings for the proxy server from the web browser so that the proxy server is not used for the local address.
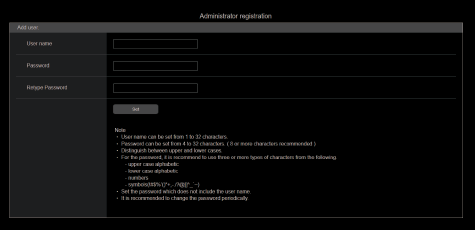
- Sets the initial account.
- Do not use a string of characters that can be easily guessed by a third party.
- Change your password regularly.
- Use at least 3 of the following 4 character types in a password of at least 8-characters in length.
- Upper case alphabet
- Lower case alphabet
- Numbers
- Symbols (! # $ % ’ ( ) * + , - . / ? @ [ ] ^ _ ` ~)
- If a password is set that does not follow the above policy, the user assumes responsibility for operation, with an adequate understanding of the security risks to the installation environment, etc.
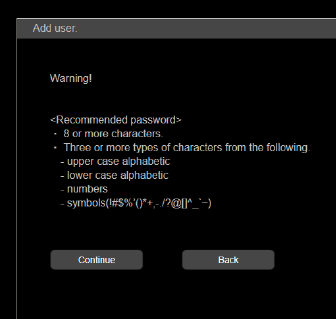
- A warning message is displayed if you set a password that does not meet the recommended setting policy. To change the password, click the [Back] button and enter another password.
To continue the settings after understanding the risk to security, click [Continue] and then complete the settings. - If you have forgotten the account information you set, execute [MAINTENANCE] > [INITIALIZE] > [READ FACTORY ALL DATA] in the camera menu, and reset the user information used for network connections.
The settings for this unit return to the factory settings when you execute [READ FACTORY ALL DATA]. - Complete registration of the initial account.
- Display the settings screen.
Use one of the web browsers below depending on the operating system installed in the personal computer.
Installed OS |
Web browser |
Windows |
Microsoft Edge Internet Explorer 11 Google Chrome |
macOS |
Safari |
If the web screen is set to be shown in the initial state, the initial account setting screen is displayed.
Set the user name and password.
|
|
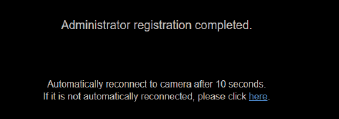
The following screen indicating registration completion is displayed after registration of the initial account is complete.
After about 10 seconds of showing this completion screen, the settings screen is automatically shown. If the screen does not transition to the settings screen even after 10 seconds have elapsed, click on the link in “please click here” to move to the settings screen manually.
This completes the procedures for registering the initial account.
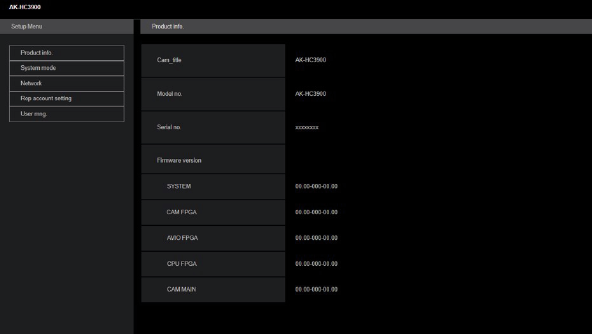
The web screen is displayed.
In the initial screen, the Product information screen [Product info.] is displayed, so switch if necessary.
When the web screen is displayed, you need to enter the account information.
|
|
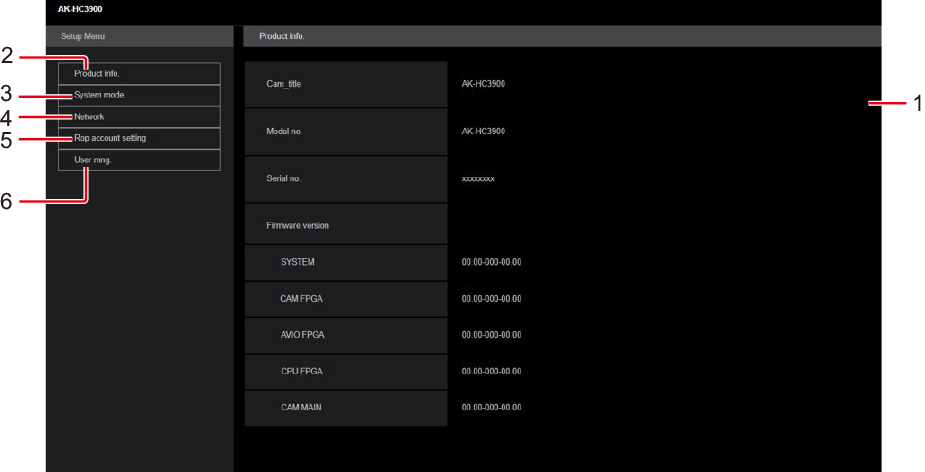
This screen enables you to make a variety of settings for this unit.
|
1 |
Main area |
The menu screen appears. |
|
2 |
Product information button [Product info.] |
Click the button to display the Product information screen [Product info.]. |
|
3 |
View system settings button [System mode] |
Click the button to display the View system settings screen [System mode]. |
|
4 |
Network settings button [Network] |
Click the button to display the Network settings screen [Network]. |
|
5 |
ROP account settings button [ROP account setting] |
Click the button to display the ROP account settings screen [ROP account setting]. |
|
6 |
User management settings button [User mng.] |
Click the button to display the User management screen [User mng.]. |
|
|
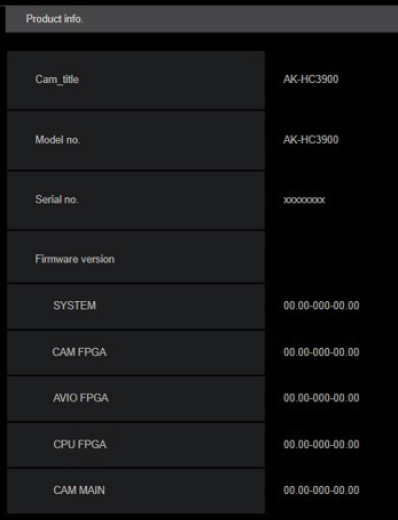
Product information screen [Product info.]
The versions of the unit's software can be checked on this screen.
The [Model no.], [Serial no.], [Firmware version] and other information about the unit is displayed.
___ indicates factory default settings.
|
Item |
Display description |
|
Cam_title |
AK-HC3900 Set the camera name displayed in the header of the web screen and in EasyIP Setup Tool Plus. |
|
Model no. |
Display the unit's model number. |
|
Serial no. |
Displays the unit's serial number. |
|
Firmware version |
SYSTEM Displays the SYSTEM version of the unit. CAM FPGA Displays the version of the CAMERA FPGA. AVIO FPGA Displays the version of AVIO FPGA. CPU FPGA Displays the version of the CPU FPGA. CAM MAIN Displays the version of the CAM MAIN. |
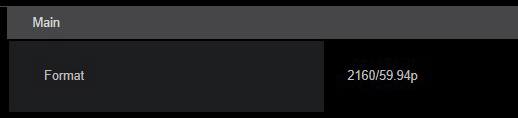
View system settings screen [System mode]
View the system format of this unit, etc., in the View system settings screen [System mode].
The View system settings screen [System mode] consists of [Main].
Click [Main] in the View system settings screen [System mode].
You can view the basic settings for the unit.
|
Item |
Display description |
|
Format |
Displays the system format setting. |
Network settings screen [Network]
Make settings related to the network in the Network settings screen [Network].
The Network settings screen [Network] consists of [Network setup], [Tally in setting], [HTTPS], [NTP] and [Common].
Click [Network setup] in the Network settings screen [Network].
Make network settings.
Confirm the settings with the [Set] button.
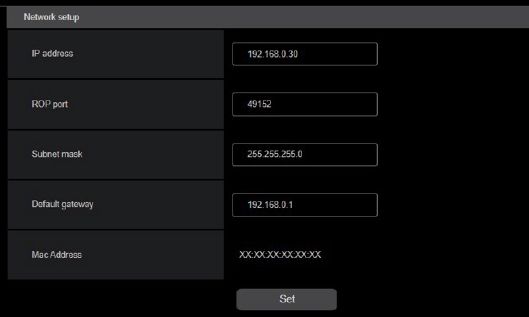
The following information is required to configure network settings. Consult your network administrator or Internet service provider.
- IP address
- Port
- Subnet mask
- Default gateway (when using a gateway server or router)
___ indicates factory default settings.
|
Item |
Setting value |
Setting details |
|
IP address |
192.168.0.30 |
Enter so that the address does not duplicate the IP addresses of the personal computer or other network cameras. |
|
ROP port |
49152 (49152, 49200 to 49299) |
Enter the port number for ROP connection. |
|
Subnet mask |
255.255.255.0 |
Enter the subnet masks. |
|
Default gateway |
192.168.0.1 |
Set the default gateways. |
|
Mac address |
Display only |
Display the MAC addresses. |
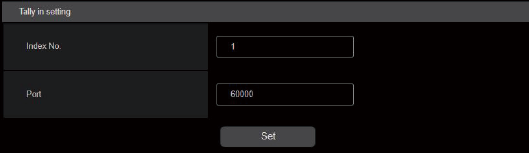
Tally in setting
Click [Tally in setting] in the Network settings screen [Network].
Make settings related to Tally control via TSL Protocol 5.0.
Confirm the settings with the [Set] button.
___ indicates factory default settings.
|
Item |
Setting value |
Setting details |
|
Index No. |
1 (1 to 65534) |
Enter the Index no. set by devices that output Tally. |
|
Port |
62000 (60000 to 65535) |
Enter the Tally in port number. |
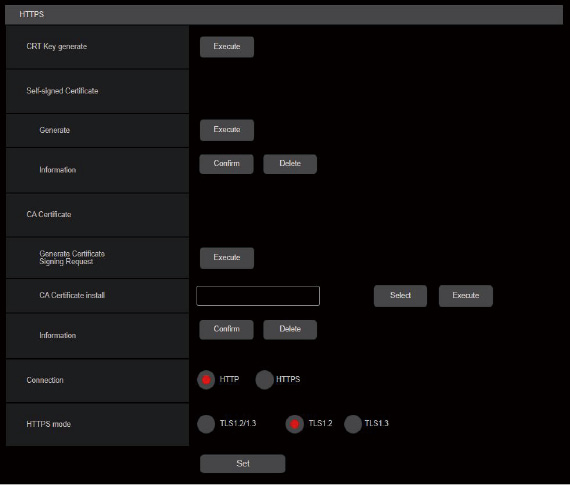
HTTPS
Click [HTTPS] in the Network settings screen [Network].
Makes settings for the HTTPS function.
The setting is confirmed with the [Set] button.
Refer to "HTTPS settings [HTTPS]" for information on how to set HTTPS.
___ indicates factory default settings.
|
Item |
Setting value |
Setting details |
|
CRT key generate |
- |
A CRT key (SSL encryption key) is generated by HTTPS. Generation of the CRT key is performed with the dialog displayed when you click the [Execute] button.
|
|
Self-signed Certificate - Generate |
- |
A self-signed security certificate is generated by HTTPS. (Self-signed Certificate) Generation of the self-signed certificate (security certificate) is performed with the dialog displayed when you click the [Execute] button.
|
|
Self-signed Certificate - Information |
- |
This displays information relating to the self-signed certificate (security certificate). When you click the [Confirm] button, the information registered in the generated self-signed certificate (security certificate) is displayed in a dialog. Click the [Delete] button to delete the generated self-signed certificate (security certificate). |
|
CA Certificate - Generate Certificate Signing Request |
- |
When using a security certificate issued by the Certificate Authority (CA) as a security certificate for HTTPS, a Certificate Signing Request (CSR) is generated for application to the Certificate Authority (CA). Generation of the Certificate Signing Request (CSR) is performed with the dialog displayed when you click the [Execute] button. |
|
CA Certificate - CA Certificate install |
- |
This displays information relating to server certificates (security certificates) issued by the Certificate Authority (CA), which are to be or are already installed. In the [File Open] dialog, which is displayed by clicking the [Select] button, select the file of the server certificate (security certificate) issued by the Certificate Authority (CA) and click the [Execute] button to install the server certificate (security certificate). If the server certificate (security certificate) is installed, its file name will be displayed.
|
|
CA Certificate - Information |
- |
This displays information relating to the server certificate (security certificate). When you click the [Confirm] button, the information registered in the installed server certificate (security certificate) is displayed in a dialog. Click the [Delete] button to delete the installed server certificate (security certificate). |
|
Connection |
HTTP HTTPS |
This sets the method to connect to the unit. |
|
HTTPS mode |
TLS1.2/1.3 TLS1.2 TLS1.3 |
This sets the encryption protocol when accessing the camera with HTTPS. |

|
|
This encrypts access to the camera and sets HTTPS to improve communication safety.
Setting HTTPS is performed by following the procedures below.
The setting is confirmed with the [Set] button.

|
|
(When using self-signed certificates) |
|
(When using server certificates) |
|
|
2. Generating a self-signed certificate (security certificate) |
||||
|
|
|
|||
|
Request to Certificate Authority (CA) - Generate Server Certificate |
||||
|
|
||||
|
|
||||
|
|
||||
|
Accessing the Camera by HTTPS |
||||
|
|
|
|
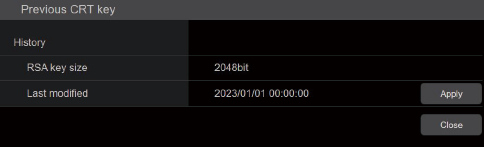
- Click the [Execute] button in [CRT key generate].
The [Current CRT key] dialog is displayed.

- The size of the generated CRT key is selected from [1024bit]/[2048bit] in [CRT key generate] – [RSA key size].
 NOTE
NOTE- When using a server certificate, the RSA key size must be in accordance with the demands of the Certificate Authority (CA) which will be applied to.
- Click the [Execute] button.
CRT key generation starts.
When CRT key generation stops, the size of the CRT key generated by the [Current CRT key] and the date and time generation concluded will be displayed.
NOTE- Perform procedures 1 to 3 to change (update) the generated CRT key. Because the CRT key, self-signed certificate and server certificate are enabled as a set, it will be necessary to once again generate a self-signed certificate or apply for a server certificate when the CRT key is changed.
- When the CRT key is changed, previous CRT keys are historically managed one at a time. Clicking the [History] button in the [CRT key] of the [Current CRT key] dialog displays the [Previous CRT key] dialog, allowing confirmation of the key size and the date and time generation was completed. Clicking the [Apply] button in [Previous CRT key] allows the previous CRT key to be switched to the current CRT key.
|
|
- Click the [Execute] button in [Self-signed Certificate] - [Generate].
[Self-signed Certificate - Generate] is displayed.
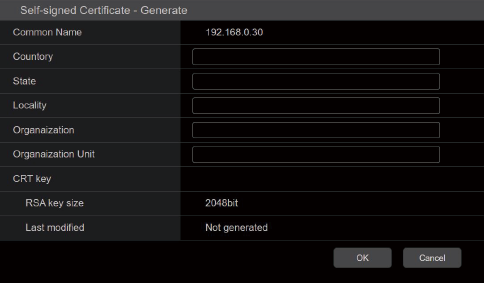
- Input information relating to the certificate to be generated.
Items to be entered are as follows.
Item
Description
Maximum number of characters
Common Name
Sets a fixed camera IP address.
Country
Inputs the country code. (can be abbreviated)
2 characters: country code
State
Inputs the name of the state. (can be abbreviated)
128 characters
Locality
Inputs the name of the city. (can be abbreviated)
128 characters
Organization
Inputs the name of the organization. (can be abbreviated)
64 characters
Organizational Unit
Inputs the name of the organizational unit. (can be abbreviated)
64 characters
CRT key
Displays the size of the current CRT key and the date and time generation was completed.
NOTE- Characters that can be input for [Common Name], [Country], [State], [Locality], [Organization], [Organizational Unit] are 0 to 9, A to Z, a to z, and the following symbols: - . _ + ( ).
- When connecting the camera to the Internet, set the address or host name to be accessed from the Internet in [Common Name]. In this case, when accessing the camera locally, a security warning screen is displayed every time the camera is accessed even when a security certificate is installed.
- When inputting the IPv6 address in [Common Name], surround the address with [ ].
e.g. [2001:db8::10]
- Click the [OK] button after inputting the address.
A self-signed certificate is generated.
NOTE- Information relating to the generated self-signed certificate is displayed in [Self-signed Certificate] - [Information]. The following is displayed depending on the status of the self-signed security certificate.
Displayed content
Description
Not generated
When the self-signed certificate is not generated
Invalid
(Reason: CA Certificate installed)
When the self-signed certificate is already generated and the server certificate is already installed
- The server certificate is enabled in this case.
[Common Name] of self-signed certificate
When the self-signed certificate is already generated and enabled
- When the [Confirm] button is clicked, the registered content of the generated self-signed certificate (security certificate) is displayed in the [Self-signed Certificate - Confirm] dialog.
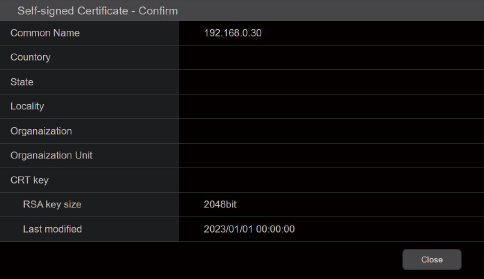
- Click the [Delete] button to delete the generated self-signed certificate (security certificate).
- When [HTTPS] is selected in [Connection], the self-signed certificate (security certificate) cannot be deleted.
- Information relating to the generated self-signed certificate is displayed in [Self-signed Certificate] - [Information]. The following is displayed depending on the status of the self-signed security certificate.
- Generating a Certificate Signing Request (CSR) [CA Certificate - Generate Certificate Signing Request]
|
|
- Click the [Execute] button in [CA Certificate - Generate Certificate Signing Request].
The [CA Certificate - Generate Certificate Signing Request] dialog is displayed.
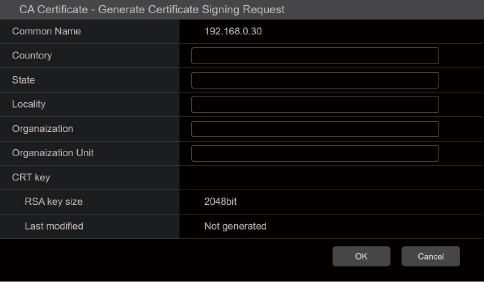
- Input information relating to the certificate to be generated.
Items to be entered are as follows.
Item
Description
Maximum number of characters
Common Name
Sets a fixed camera IP address.
Country
Inputs the country code. (can be abbreviated)
2 characters: country code
State
Inputs the name of the state. (can be abbreviated)
128 characters
Locality
Inputs the name of the city. (can be abbreviated)
128 characters
Organization
Inputs the name of the organization. (can be abbreviated)
64 characters
Organizational Unit
Inputs the name of the organizational unit. (can be abbreviated)
64 characters
CRT key
Displays the size of the current CRT key and the date and time generation was completed.
NOTE- When using a server certificate, the information to be input must be in accordance with the demands of the Certificate Authority (CA), which will be applied to.
- Characters that can be input for [Common Name], [Country], [State], [Locality], [Organization], [Organizational Unit] are 0 to 9, A to Z, a to z, and the following symbols: - . _ + ( ).
- Click the [OK] button after inputting the address.
The [Save As] dialog is displayed.
- In the [Save As] dialog, assign a file name to the Certificate Signing Request (CSR) and save it in personal computer.
Apply to the Certificate Authority (CA) using the saved Certificate Signing Request (CSR).
NOTE- A server certificate is issued for both the generated Certificate Signing Request (CSR) and CRT key. The issued server certificate can no longer be used when generating/updating the CRT key after applying to the Certificate Authority (CA).
- The Certificate Signing Request (CSR) generated by this unit is in a PEM format.
|
|
- Click the [Select] button in [CA Certificate - CA Certificate install].
The [Open File] dialog is displayed.
- Select the server certificate file and click [Open]. Then click the [Execute] button.
The server certificate is installed.
NOTE- The name of the host registered to the installed server certificate is displayed in [CA Certificate] - [Information]. The following is also displayed depending on the status of the server certificate.
Displayed content
Description
Invalid
When the server certificate is not installed
[Common Name] of server certificate
When the server certificate is already installed and enabled
Expired
When the effective period of the server certificate has expired
- When the [Confirm] button is clicked, the content of the installed server certificate (security certificate) is displayed in the [CA Certificate - Confirm] dialog. (An asterisk is displayed in the [Organizational Unit] field only.)
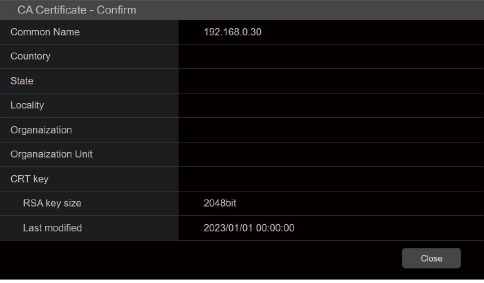
- Click the [Delete] button to delete the installed server certificate (security certificate).
- When [HTTPS] is selected in [Connection], the server certificate (security certificate) cannot be deleted.
- Perform STEP 1 to STEP 2 to update a server certificate.
- To delete an enabled server certificate (security certificate), confirm that there is a backup to the said certificate in your personal computer or recording media. A server certificate (security certificate) will be needed to reinstall it.
- The HTTPS function can no longer be used when the effective period of the server certificate has expired. In such a case, the connection method is changed to HTTP when the unit is restarted. Update the server certificate before its effective period expires.
- The effective period of the server certificate can be confirmed by double-clicking the server certificate file issued by the Certificate Authority (CA).
- The name of the host registered to the installed server certificate is displayed in [CA Certificate] - [Information]. The following is also displayed depending on the status of the server certificate.
- Set the method to access the camera in [Connection].
HTTP: Only HTTP connection is possible.
HTTPS: Only HTTPS connection is possible.
NOTE- When using an HTTPS connection, network connection with the AK-HRP1000, AK-HRP1005, AK-HRP1010, AK-HRP250, and AK-MSU1000 will be disabled.
- Set the Port No. to be used with HTTPS in [HTTPS port].
Port No. that can be selected: 1 to 65535
The following port numbers are used by the unit so they cannot be used.
20, 21, 23, 25, 42, 53, 67, 68, 69, 80, 110, 123, 161, 162, 554, 995, 10669, 10670, 59000 to 61000
Factory settings: 443
- Set the encryption protocol used with HTTPS in [HTTPS mode].
TLS1.2/1.3: Connection with TLS1.2/1.3 is possible.
TLS1.3: Connection with TLS1.3 is possible.
TLS1.2: Connection with TLS1.2 is possible.
- Click the [Set] button.
The camera restarts and access to the camera via HTTPS is enabled.
NOTE- This unit will restart if the connection method is changed.
- Using a self-signed certificate
A warning screen is displayed when accessing the camera by HTTPS for the first time. Install the self-signed certificate (security certificate) in your personal computer in accordance with the screen instructions.
- Using a server certificate
Install the Certificate Authority (CA) root certificate or intermediate certificate in your web browser in advance. Follow the Certificate Authority (CA) procedures to acquire and install root certificates and intermediate certificates. - When accessing the camera by HTTPS, the image display speed and frame rate of the moving image may reduce.
- When accessing the camera by HTTPS, it may take some time for the images to be displayed.
- When accessing the camera by HTTPS, images may be disturbed and sound may be interrupted.
- The maximum number of cameras that can be connected simultaneously depends on the maximum image size and distribution format.
- Launch the web browser in your personal computer.
- Input the camera’s IP address in the address bar of the web browser.
Input address: https://192.168.0.10/
NOTE- When the HTTPS port No. is changed from “443”, input “https://camera IP address: Port No.” in the address bar.
E.g. https://192.168.0.11:61443 - When this unit is in a local network, set a proxy server from the web browser (menu bar: [Tools] - [Internet Options]) to ensure that a proxy server is not used for a local address.
- When the HTTPS port No. is changed from “443”, input “https://camera IP address: Port No.” in the address bar.
- Press the [Enter] key.
The live screen [Live] is displayed.
The security certificate is installed when the security warning screen is displayed.
“Install the security certificate”When [User auth.] is set to [On], the user name and password input screen is displayed before the live screen [Live] appears.
NOTE- When HTTPS is used, screen and image display may slow down and image update interval (frame rate) may also slow down.
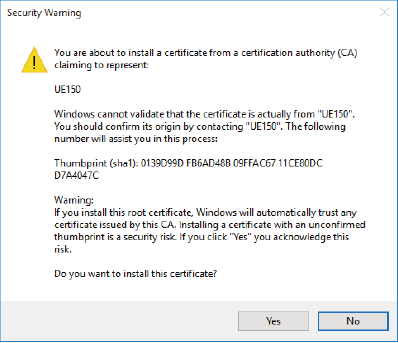
When using HTTPS to access the camera, the security warning screen will be displayed if the security certificate of the said camera has not been installed in your personal computer. To prevent this warning screen being displayed, the security certificate must be installed in accordance with the following procedures. If it is not installed, the security warning screen will be displayed every time the camera is accessed.
|
|
- Accessing the Camera by HTTPS.
- When the security warning screen is displayed, click [Continue to this website (not recommended).].
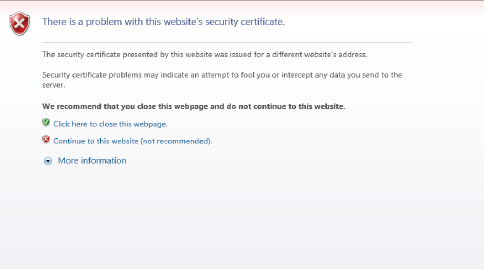
The live screen [Live] is displayed.
When the authentication screen is displayed, input the user name and password.
NOTE- When the above screen is displayed after accessing a device apart from the camera or a website, there may be a security problem, so check this carefully.
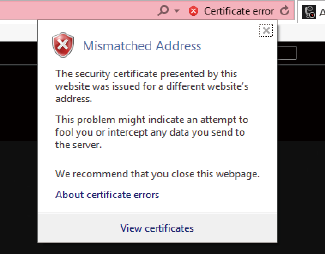
- Click [Certificate error] in the URL and then click [View certificates].
- Click [Install Certificate...].
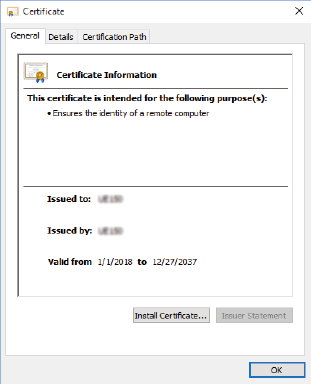 NOTE
NOTE- If [Install Certificate...] is not displayed, close Internet Explorer and restart it by selecting [Run as Administrator]. Right-click on [Start] - [Program] - [Internet Explorer] and click [Execute as Administrator (A)..].
- Click [Next], which is displayed in the certificate import wizard.
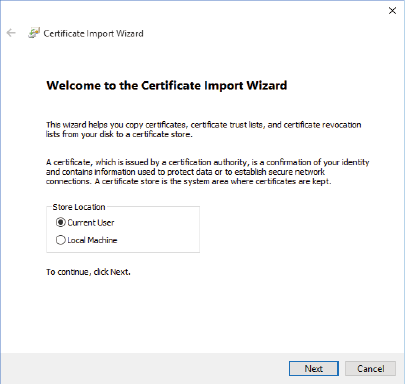
- Select [Place all certificates in the following store] and click [Browse...].
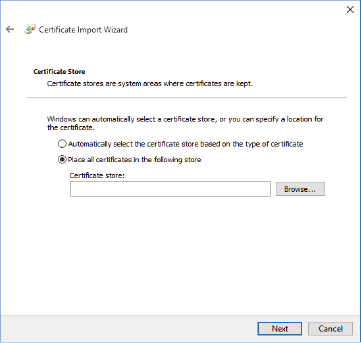
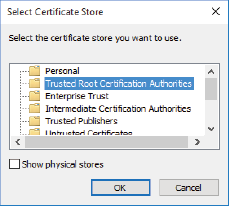
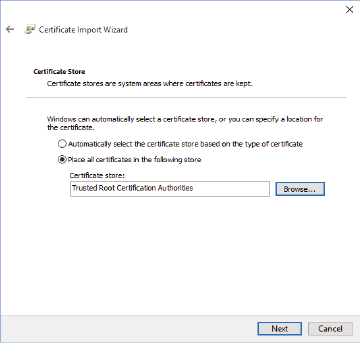
- Select [Trusted Root Certification Authorities] and click [OK].
- Click [Next].
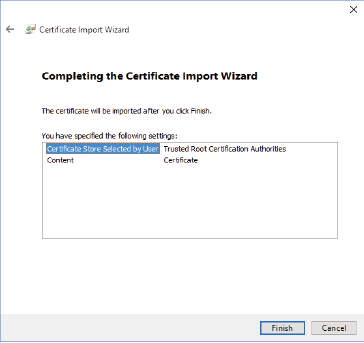
- Click [Finish].
- Click [Yes].
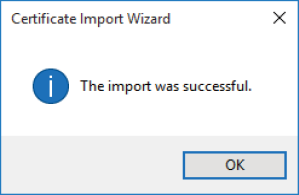
When importing is finished, the “The import was successful.” screen is displayed.
- Click [OK].
Closing the web browser after importing the certificate and reconnecting to it will stop the “Certificate error” screen being displayed.
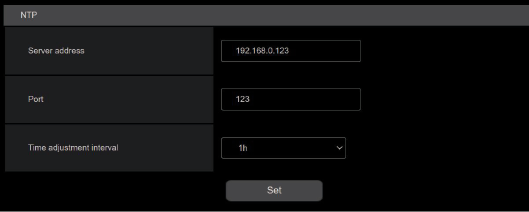
NTP
Click [NTP] in the Network settings screen [Network].
Make settings for the NTP function.
Confirm the settings with the [Set] button.
___ indicates factory default settings.
|
Item |
Setting value |
Setting details |
|
Server address |
192.168.0.123 |
Input the IP address of the NTP server. |
|
Port |
123 |
Input the port No. of the NTP server. |
|
Time adjustment interval |
1h |
Selects the interval (1 to 24 hours in 1-hour increments) for acquiring the time from the NTP server. |
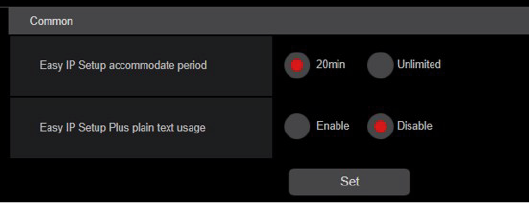
Common
Click [Common] in the Network settings screen [Network].
Make shared network settings.
Confirm the settings with the [Set] button.
___ indicates factory default settings.
|
Item |
Setting value |
Setting details |
|
EasyIP Setup accommodate period |
20min. Unlimited |
Sets the time allowed for network setting operations from EasyIP Setup Tool Plus. 20min. Allows camera setting operations on the EasyIP Setup Tool Plus for just 20 minutes after start up of this unit. Unlimited Allows camera setting operations on the EasyIP Setup Tool Plus at any time.
|
|
EasyIP Setup Plus plain text usage |
Enable Disable |
Sets whether to enable or disable encryption of communications when communicating with EasyIP Setup Tool Plus. Enable Communications are sent and received as plain messages. Disable Communications are sent and received as encrypted messages. |
ROP account settings screen [ROP account setting]
Make the settings for user accounts required to connect to ROPs (AK-HRP250/AK-HRP1000/AK-HRP1005/AK-HRP1010/AK-HRP1015) from this unit in the ROP account settings screen [ROP account setting]. The accounts can also be deleted here. Up to 12 users can be registered.
The ROP account settings screen [ROP account setting] consists of [User list] and [Add user].
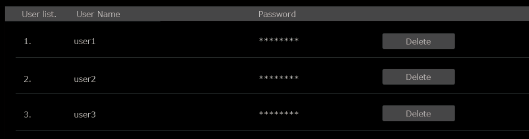
User list
Click [User list] in the ROP account settings screen [ROP account setting].
Information about accounts already registered is displayed.
To delete a registered user account, click the [Delete] button to the right of the relevant account.
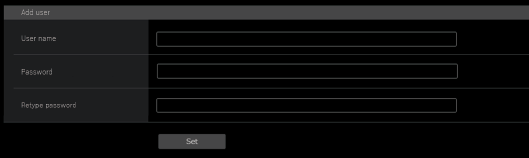
Add user
Registers a user account.
|
Item |
Setting details |
|
User name |
Enter the user name.
1 to 8 half-size characters
|
|
Password Retype password |
Enter the password.
1 to 31 half-size characters |
User management screen [User mng.]
In the User management screen [User mng.], register authentication for users that can access this unit from personal computers and mobile terminals. Up to 3 users can be registered.
The User management screen [User mng.] consists of [User list] and [Add user].
|
|
User list
Click [User list] in the User management screen [User mng.].
Information about accounts already registered is displayed.
To delete a registered user account, click the [Delete] button to the right of the relevant account.
|
|
Add user
Registers a user account.
|
Item |
Setting details |
|
User name |
Enter the user name.
1 to 32 half-size characters
|
|
Password Retype password |
Enter the password.
4 to 32 half-size characters |