- Top
- Web Screen
- Setting the network
- Configuring the camera using EASY IP Setup Software
Configuring the camera using EASY IP Setup Software
Network setting of this unit can be set using EASY IP Setup Software.
To configure multiple cameras, settings must be configured for each.
Set the setting of this unit and the computer individually with [MAIN MENU] → [NETWORK SETUP] when it cannot be set with EASY IP Setup Software.
|
 NOTE
NOTESetting procedure
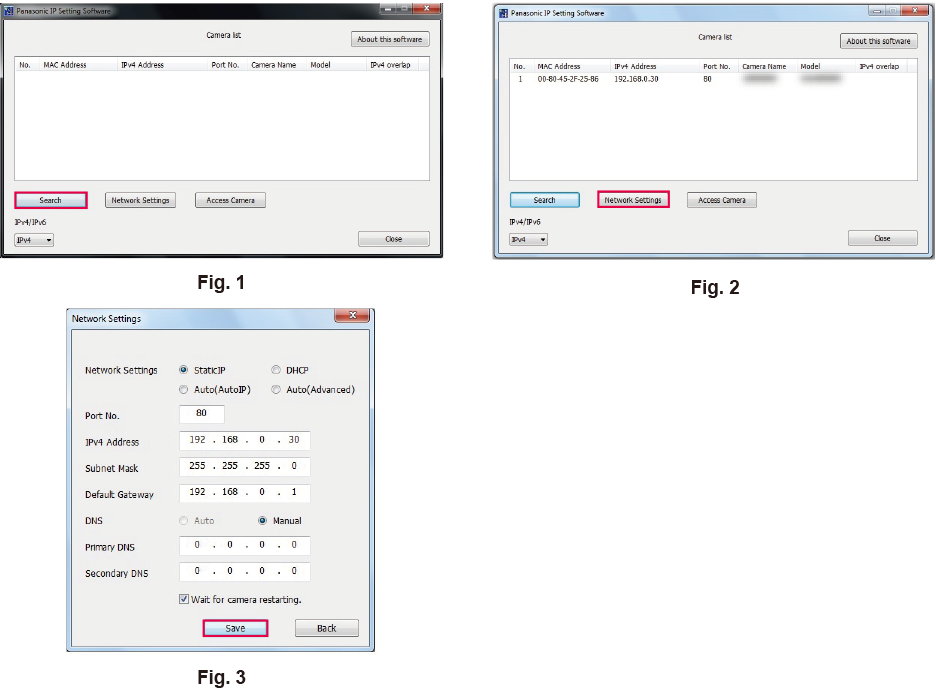
- Start EASY IP Setup Software.
- Click the [Search] button. (Fig. 1)
- Click the MAC address/IPv4 address of the camera to configure, and then click the [Network Settings] button. (Fig. 2)
- If there is an IP address conflict, the number of the camera with the conflicted address is displayed in the [IPv4 overlap] field of the corresponding camera.
- Click the [Access Camera] button to display the [Live] screen of the selected camera.
- Enter each item for the network, and then click the [Save] button. (Fig. 3)
- This camera only supports the [Fixed IP] connection mode. As DHCP is not supported, do not set the connection mode to DHCP.
- After clicking the [Save] button, it will take approximately two minutes to complete configuration of the camera.
Disconnecting the AC adaptor or LAN cable before the configuration has been completed will invalidate the settings. In such a case, configure the settings again.
|