- Top
- Menu Operations
- Menu operations
- Basic operations
Basic operations
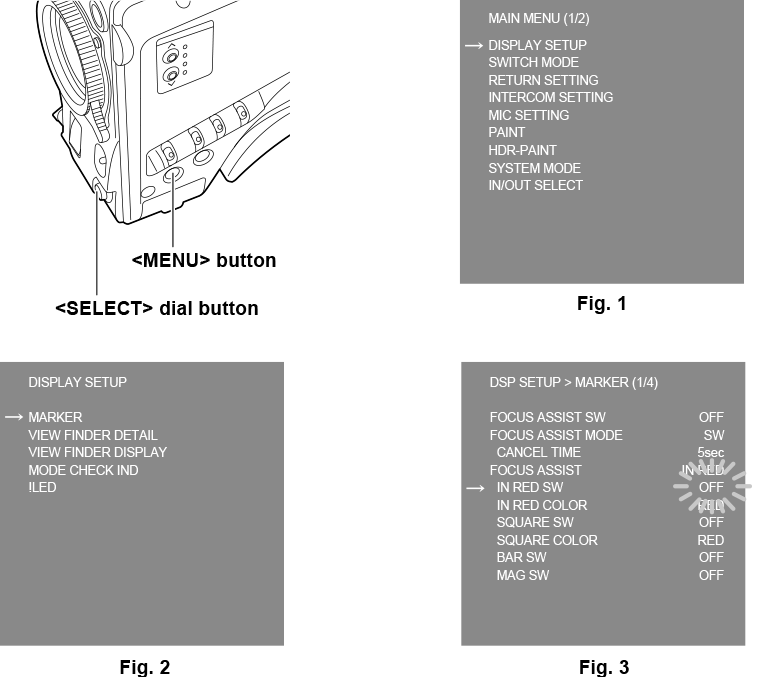
- Press the <MENU> button.
The [MAIN MENU] screen of the camera is displayed on the viewfinder or monitor. (Fig. 1)
- Turn the <SELECT> dial button to select an item.
- Press the <SELECT> dial button.
The menu of the selected item is accessed. (Fig. 2)
- Turn the <SELECT> dial button to select a menu item to configure.
- Press the <SELECT> dial button.
The setting of the item indicated by the arrow flashes. (Fig. 3)
- Turn the <SELECT> dial button and change the setting.
- Press the <SELECT> dial button.
The setting is confirmed.
Pressing the <MENU> button to exit the menu screen also reflects the setting.
Entering characters
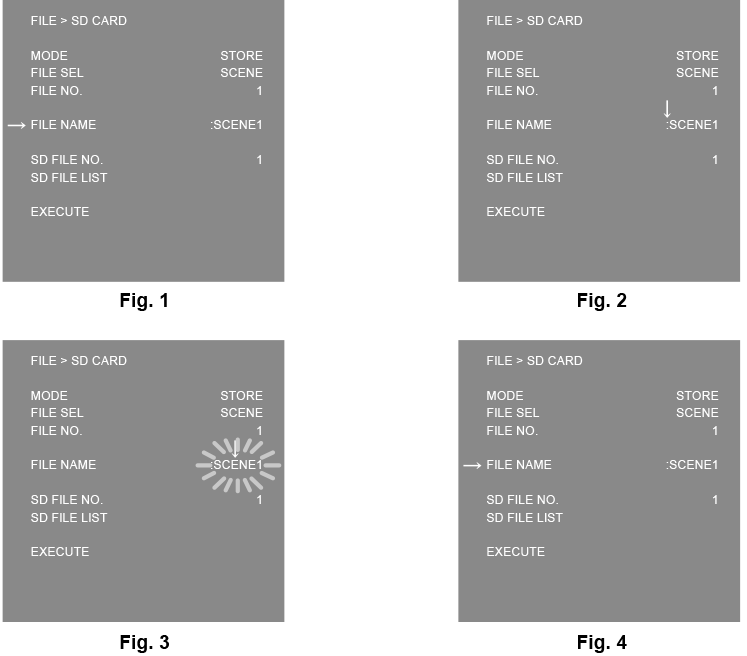
- Press the <SELECT> dial button.
The cursor changes to a downward arrow which appears over the colon (:). (Fig. 1, Fig. 2)
- Turn the <SELECT> dial button to move the arrow to the character to be changed.
- Press the <SELECT> dial button.
The character to be changed flashes. (Fig. 3)
- Turn the <SELECT> dial button and change the character.
- Press the <SELECT> dial button.
The setting is confirmed.
Perform the same operation for all characters to be changed.
- Turn the <SELECT> dial button to move the downward arrow cursor over the colon (:).
- Press the <SELECT> dial button.
The cursor changes to a horizontal arrow and another item can be selected. (Fig. 4)