- Top
- Description of Parts
- Time code section
Time code section
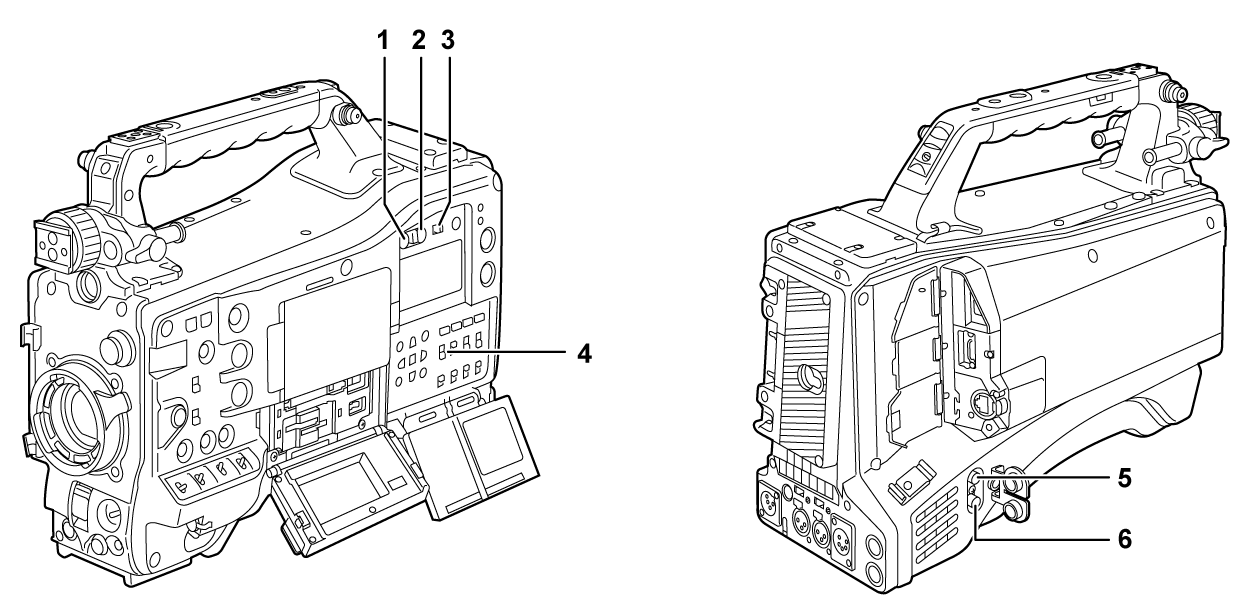
<HOLD> button
The time data indication on the counter display area is retained from the moment when this button is pressed. However, the time code generator continues to advance. Press the button again to release the retained state.
This is used when you want to know the time code of the recorded scene or the counter data of the counter display.
<RESET> button
Resets the counter data of the counter display to [00:00:00:00].
To return the real time data to factory settings, set the <TCG> switch to <SET> and press the <RESET> button. Both the time code data and user bits data are reset to 0.
<DISPLAY> switch
Displays the counter data, time code, or user bits in the counter of the display window according to the setting position of the <DISPLAY> switch and the <TCG> switch.
<UB>: Displays the user bits.
<TC>: Displays the time code.
<COUNTER>: Displays the counter data.
<TCG> switch
Sets the advance mode for the built-in time code generator.
<F-RUN>: Use this to advance the time code continuously regardless of the memory card recording operation. Set to this position to, for example, set the time code to the current time or externally lock the time code.
<SET>: Use this to set the time code or user bits.
<R-RUN>: Use this to advance the time code only when recording. The time codes will remain continuous when recording continuously between memory cards.
<GENLOCK IN> terminal
Inputs reference signals when the camera unit is genlocked or when the time code is externally locked.
<TC IN/OUT> terminal
Connects to an external equipment and output/input a time code.
Inputs the standard time code when locking the time code with an external equipment.
Input and output are set in the [RECORDING] menu → [TC/UB] → [TC IN/OUT SEL].