- Top
- Description of parts
- Audio (input) function section
Audio (input) function section
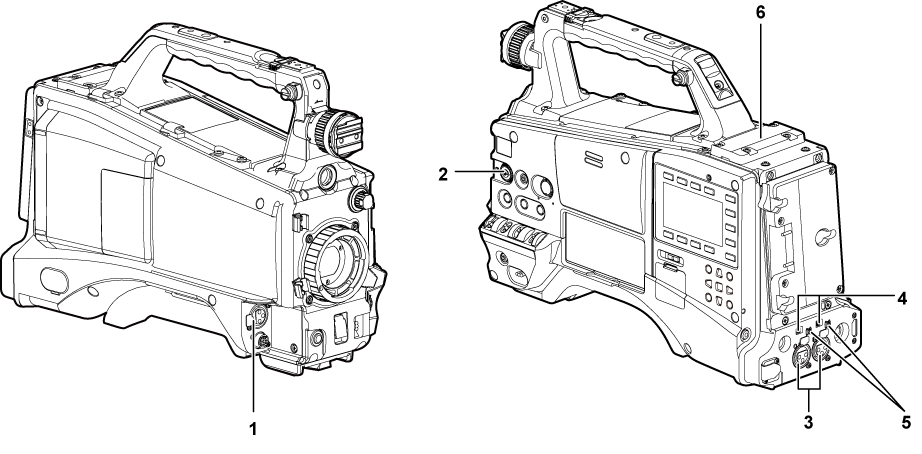
<MIC IN> terminal (Using front microphone)
Connect the microphone (optional).
The phantom microphone can also be used. To use this, set [ON] in the main menu → [AUDIO SETUP] → [INPUT SETTING] → [FRONT MIC POWER]. When it is set to [ON] and a microphone is not connected, low frequency noise may occur. This is not a problem when a microphone is connected.
<F.AUDIO LEVEL> dial (Selecting the <F.AUDIO LEVEL> dial function)
Adjust the recording level of audio channels 1 to 4.
Setting the audio level adjustment method to [MANU] on the [AUD02:INPUT] screen of SmartUI allows you to adjust the audio level of the voice channel using this dial.
You can use the main menu → [AUDIO SETUP] → [RECORDING CH SETTING] → [FRONT VR CH1], [FRONT VR CH2], [FRONT VR CH3], and [FRONT VR CH4] to set the controls so that this operation can be done from any input terminal.
<AUDIO IN CH1/3>, <AUDIO IN CH2/4> terminal (Using audio devices)
Connect the audio equipment or the microphone.
<LINE>/<MIC> switch (Using audio devices, Inspections for using an external microphone)
Switch audio input signals connected to the <AUDIO IN CH1/3>/<AUDIO IN CH2/4> terminal.
<LINE>: Select when audio equipment is connected by the line input.
<MIC>: Select when the external microphone is connected.
Microphone input power switch (Inspections for using an external microphone)
Switch to supply power to the microphones connected to <AUDIO IN CH1/3> and <AUDIO IN CH2/4> terminals.
<+48V>: Supplies +48 V power to the microphone.
<OFF>: Does not supply power to the microphone.
Wireless slot (When using a wireless microphone receiver)
Mount the UniSlot wireless microphone receiver (optional).