- Top
- Menu Operations
- Setting menu display
- Setting menu basic operations
Setting menu basic operations
You can change camera settings using the setting menu according to the shooting scene and recording details.
The menu is divided into the main menu, submenu, and setting item menu.
Set data are written and saved in the internal memory of the camera.
This section describes main menu operations. Main menu operation is the same as the other menus except when opening the menu screen.
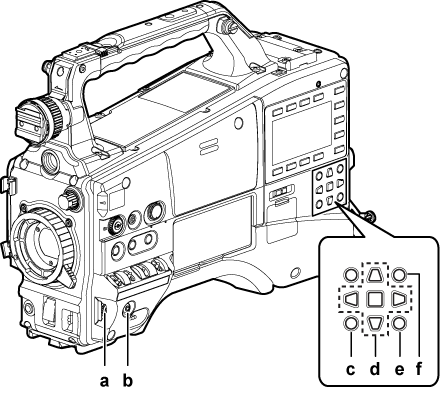
Jog dial button
<MENU> button
<EXIT>/<CANCEL> button


 cursor buttons
 <SET> button
<THUMBNAIL MENU> button
This button functions in the same way as the <MENU> button.
<SHIFT> button
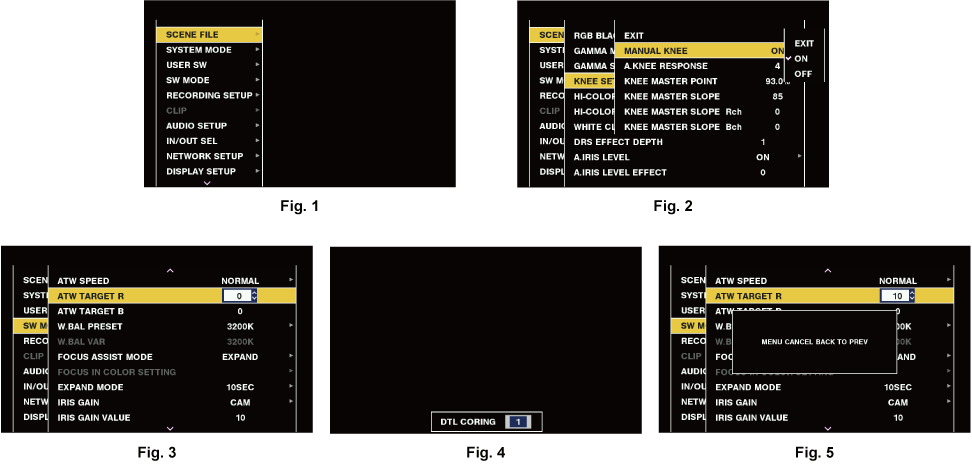
Press and hold the <MENU> button for three seconds or more when not recording.
The main menu screen appears on the viewfinder.
Use the jog dial button (or the cursor buttons (/)) to place the cursor on the corresponding menu item. (Fig. 1)
Press the cursor buttons (
/) to move the cursor up or down.If there is a menu in the next level, [
 ] is displayed in the menu items.
Press the jog dial button, the cursor button (
), or the <SET> button to open lower-level menus. (Fig. 2) Press the cursor button (
) or the <EXIT> button to return to the upper-level menu. You can go back to the upper levels by using the jog dial button to place the cursor on the topmost line ([EXIT]) then pressing it.
Press the jog dial button (or the <SET> button).
The confirmation screen is displayed depending on the menu item.
Select the process using the cursor buttons (
///), and press the <SET> button.A checkmark is placed in front of the set item.
In some menus, a screen for setting value is displayed on the menu screen (Fig. 3) or at the bottom of the screen (Fig. 4).
In some menus, a message is displayed if a menu cannot be executed.
Press the <MENU> button to close the menu.
This brings you back automatically to the previous screen depending on the menu item.