Retention of user bits in memory
User bit settings are automatically recorded and are retained even if the power is turned off.
Operating Instructions AJ-PX380G
By setting user bits, information such as memos (date, time) up to eight digits long (hexadecimal) can be recorded.
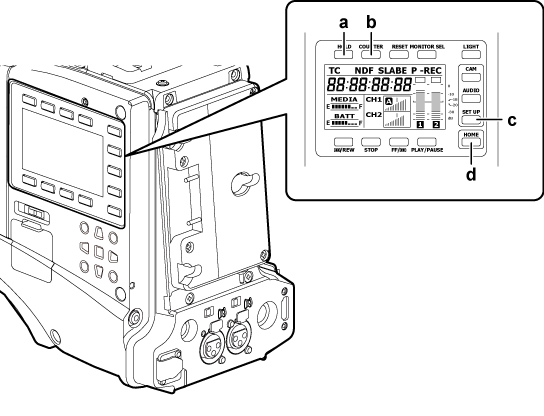
<HOLD> button
<COUNTER> button
<SETUP> button
<HOME> button
Press the <SETUP> button to display the [SET01:TC/UB] screen of SmartUI.
Press the <COUNTER> button to set the counter display to [UB].
Press the < /REW> button to set [UBG] to [SET].
Set the user bits.
Press the upper or lower buttons that correspond to the following screen displays.
[→]: The digit to be set moves to the right.
[+]: The digit to be set moves to the left.
[−]: The value of the digit to be set is incremented by one.
[RST]: The value of the digit to be set is decremented by one.
Press the </REW> button, enter the values of user bits, and exit the user bits settings screen.
Select [USER] in the main menu → [RECORDING SETUP] → [UBG MODE].
User bit settings are automatically recorded and are retained even if the power is turned off.
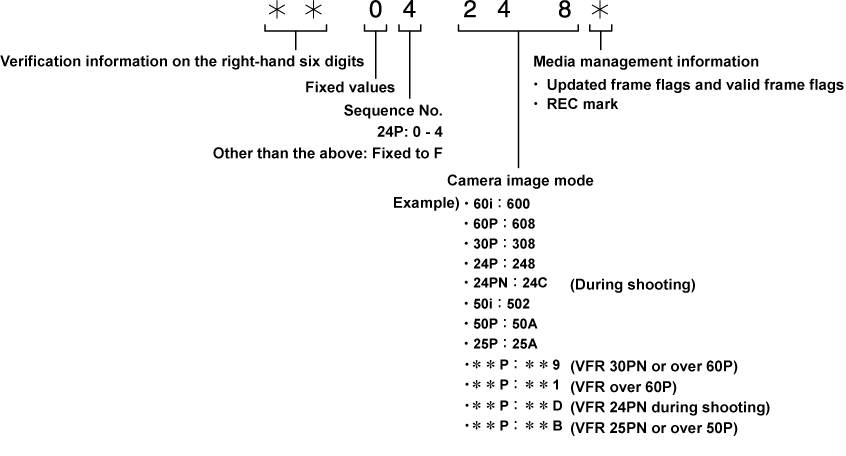
Saving the frame rate values for the image information shot/saved according to the frame rate set in the main menu → [SYSTEM MODE] to user bits allows you to use the editor (personal computer editing software).
Information is always saved in VITC UB.
In addition, selecting [FRAME RATE] in the main menu → [RECORDING SETUP] → [UBG MODE] saves the information also in user bits (LTC UB). In playback of clips recorded in native format, the same values as the frame rate information obtained by playing back recorded user bits are also output as HD SDI output signals or user bits of TC output from the <TC IN/OUT> terminal.
The relationship between frame rates, image pull-down, and time codes/user bits is as follows.