Specifying the network settings using the settings tool

Camera settings

From the [NETWORK] menu → [UTILITY] → [EASY IP SETTING], select anything other than [DISABLE].

Select the [NETWORK] menu → [UTILITY] → [EASY IP CAMERA TITLE].

Enter the name (nickname) of the camera.

Entered name will be the name to be displayed on the EASY IP Setup Software screen.
Installing software

Download and install EASY IP Setup Software (EasyIPSetup.exe) from the following website. (Windows)

https://pro-av.panasonic.net/

Performing settings of the camera using EASY IP Setup Software

The settings for the camera network can be performed using EASY IP Setup Software.

The settings for multiple cameras need to be performed on each camera.

If the settings cannot be specified using EASY IP Setup Software, specify the settings of the camera in the [NETWORK] menu.

Setting procedure

co_other_web_easyIPsetup_2

Start EASY IP Setup Software.

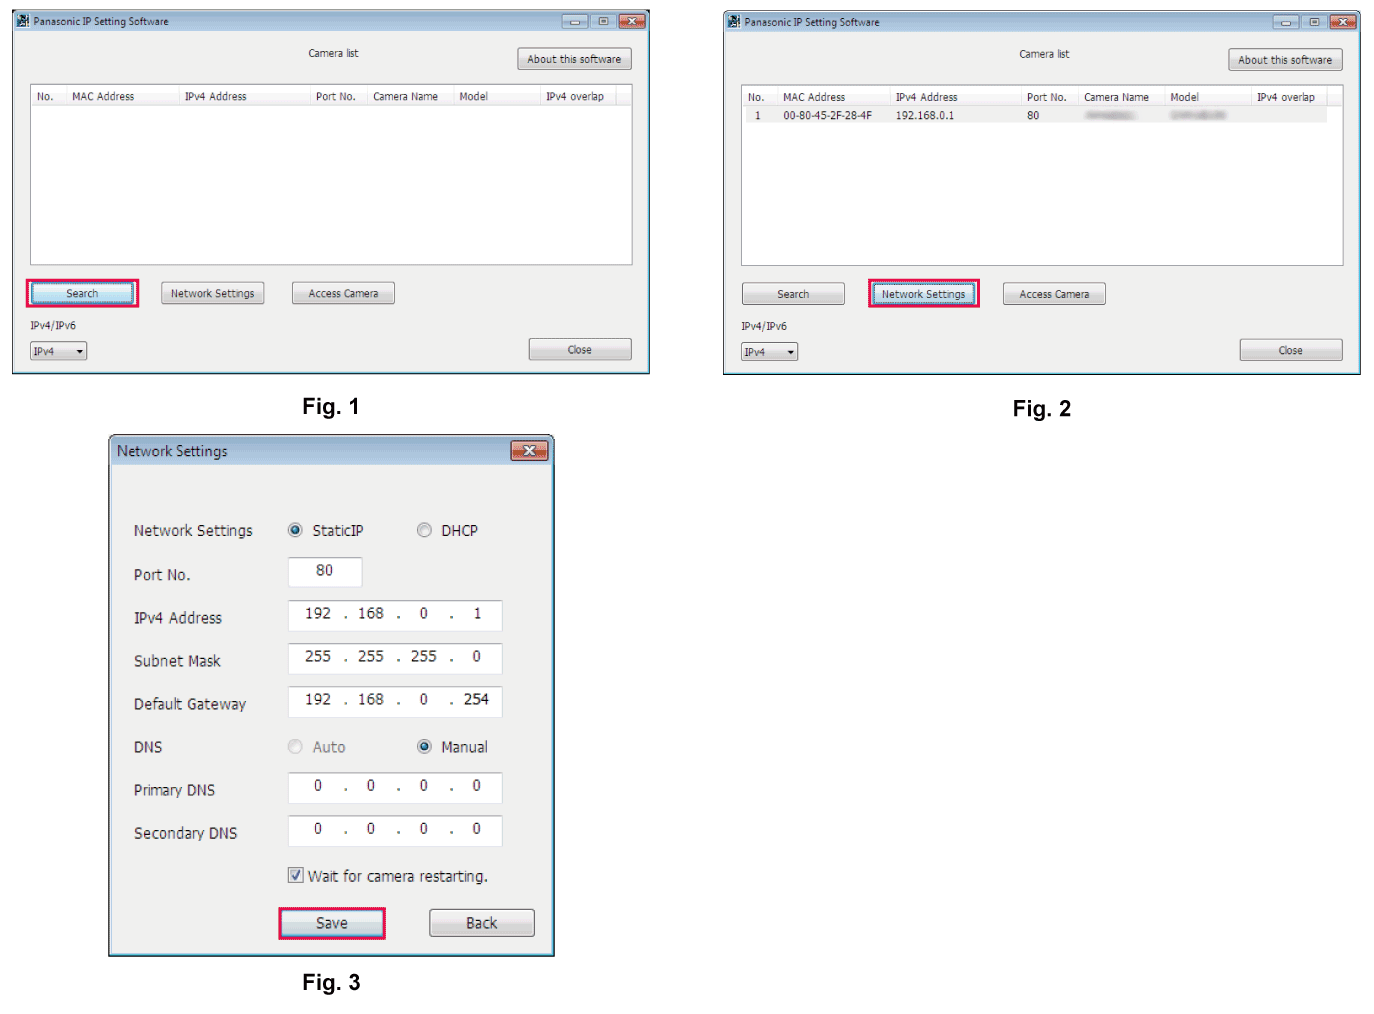
Click [Search]. (Fig. 1)

Click the MAC address/IPv4 address of the camera to set, and then click [Network settings]. (Fig. 2)

  • When there are overlapping IP addresses, overlapping camera numbers are displayed in the [Duplicate IPv4 address] field of the corresponding camera.

Enter each of the network setting items, and then click [Save]. (Fig. 3)

  • The connection mode of the camera only supports [Fixed IP]. DHCP and other protocols are not supported. Do not specify these settings.

  • It may take approximately two minutes to complete the setting of the camera after clicking [Save].

    The settings become invalid if the AC adaptor or LAN cable is disconnected before the settings are complete. Specify the settings again.