- Top
- Web Screen
- Network settings
- Using Easy IP Setup Software to set the unit’s settings
Using Easy IP Setup Software to set the unit’s settings
The settings related to the unit’s network can be set using the supplied Easy IP Setup Software.
To set the settings for a multiple number of units, the settings must be selected for each camera involved.
If the settings cannot be set using Easy IP Setup Software, set the settings for the unit and personal computer individually in [MAINTENANCE] > [NETWORK] of the CCU menu.

Setting Procedure
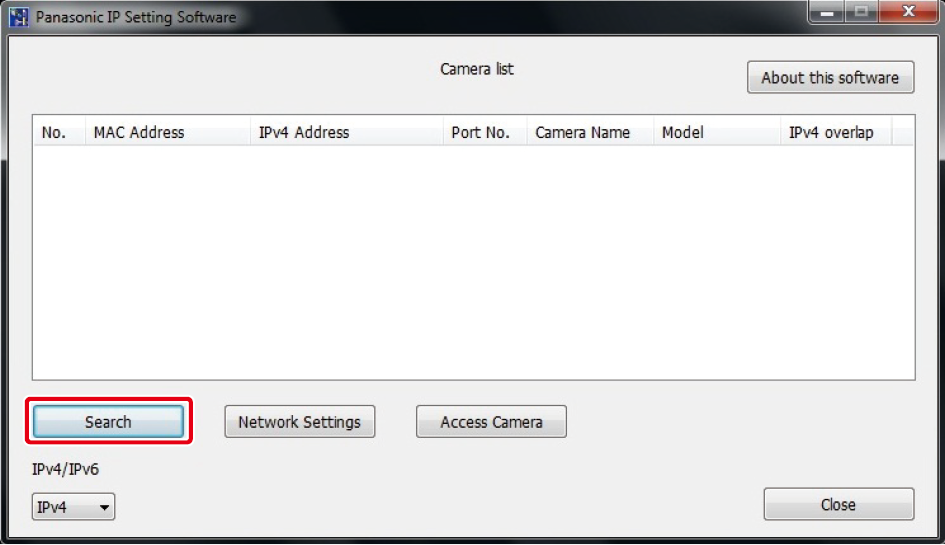
1.Start the Easy IP Setup Software.
2.Click the [Search] button.
3.Click the MAC address/IPv4 address of the camera to be set, and click the [Network Settings] button.
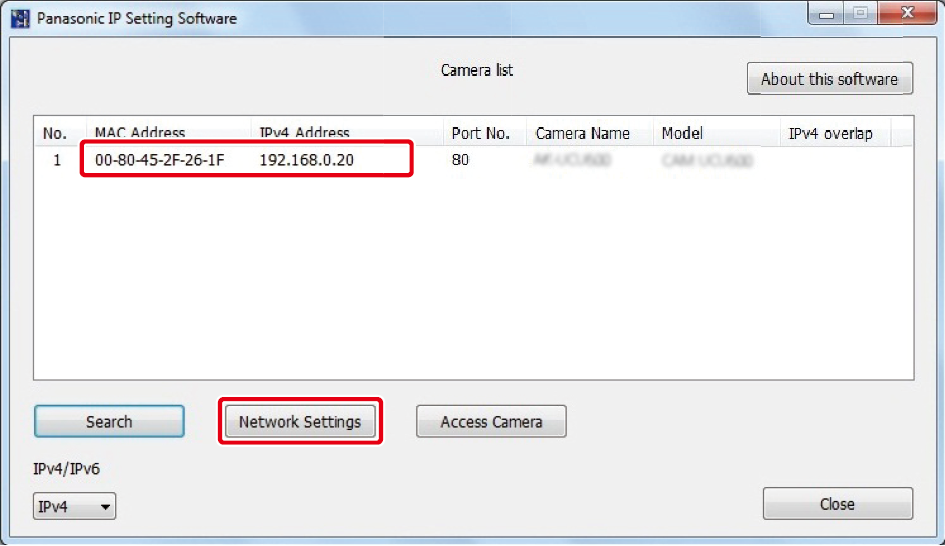
- If the same IP address is used for any additional cameras, the numbers of the additional cameras will be displayed in the [IPv4 overlap] column of the cameras concerned.
- When the [Access Camera] button is clicked, the Live screen of the selected camera is displayed.
4.Input the network items, and click the [Save] button.
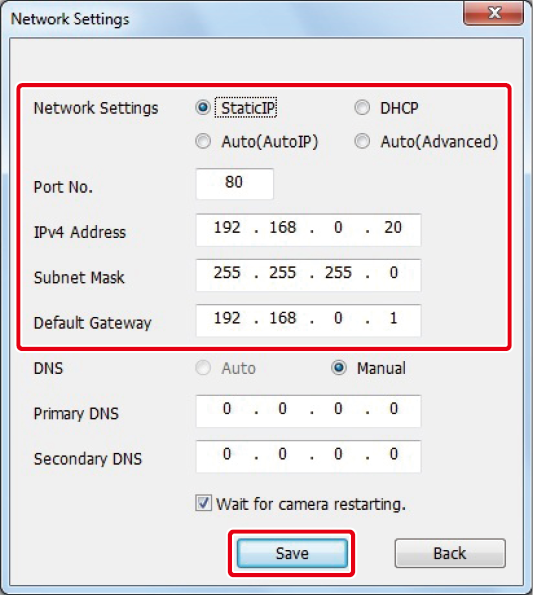
- The connection mode of the unit supports only [Static IP]. Do not set, for example, DHCP because it is not supported.
- After the [Save] button is clicked, it takes about 2 minutes for the settings in the unit to be completed. If the AC Adaptor or LAN cable is disconnected before the settings are completed, the settings will be canceled. In this case, repeat the steps to set the settings.